


Your Windows 11 PC might be slower and more cramped than it needs to be, not because of your apps, not because of your photos, but because Windows itself is quietly sitting on a chunk of your drive. It is called Reserved Storage. And if you have a small SSD (256GB or 512GB), that could be what’s making your PC feel tight.
Here is what it is, whether you should turn it off, and the exact steps to do it.
What Is “Reserved Storage” in Windows 11?
Reserved Storage is a feature Microsoft added to Windows 10 in 2019 and carried over to Windows 11. It sets aside a chunk of your drive, usually around 7GB, sometimes more specifically for Windows updates, temporary files, and system caches.
The idea is simple: if your drive ever fills up, Windows still has a dedicated pool of space it can use to run updates and keep things working. Without it, a nearly-full hard drive could cause Windows updates to fail or apps to behave strangely.
Makes sense in theory. But if you have a 256GB laptop and you’re already tight on space, giving up 7–10GB to Windows “just in case” feels like a bad deal.
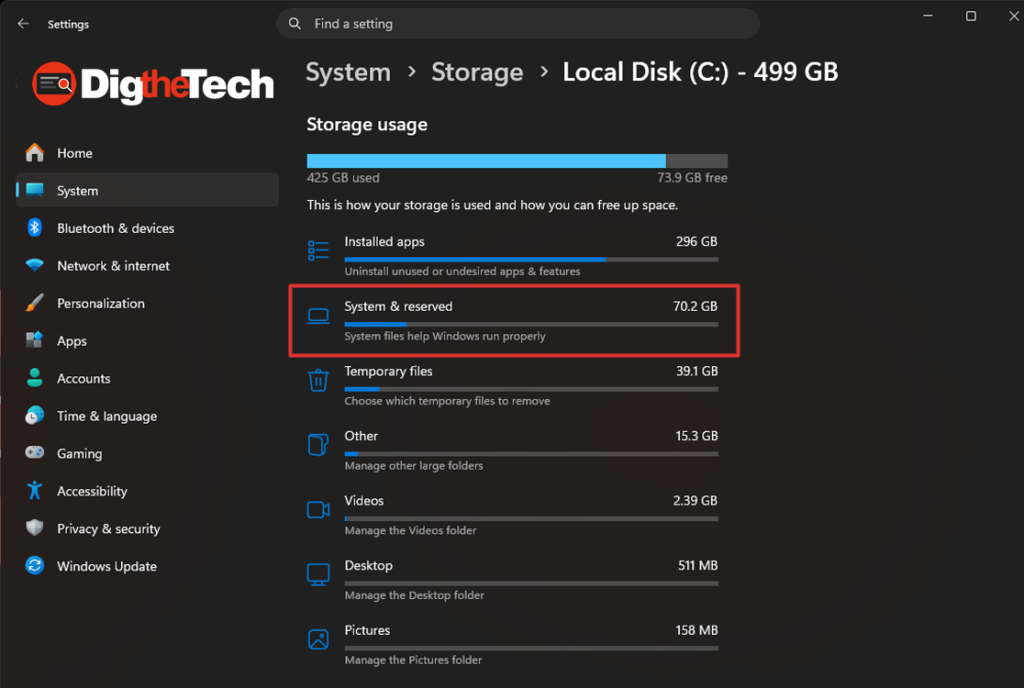
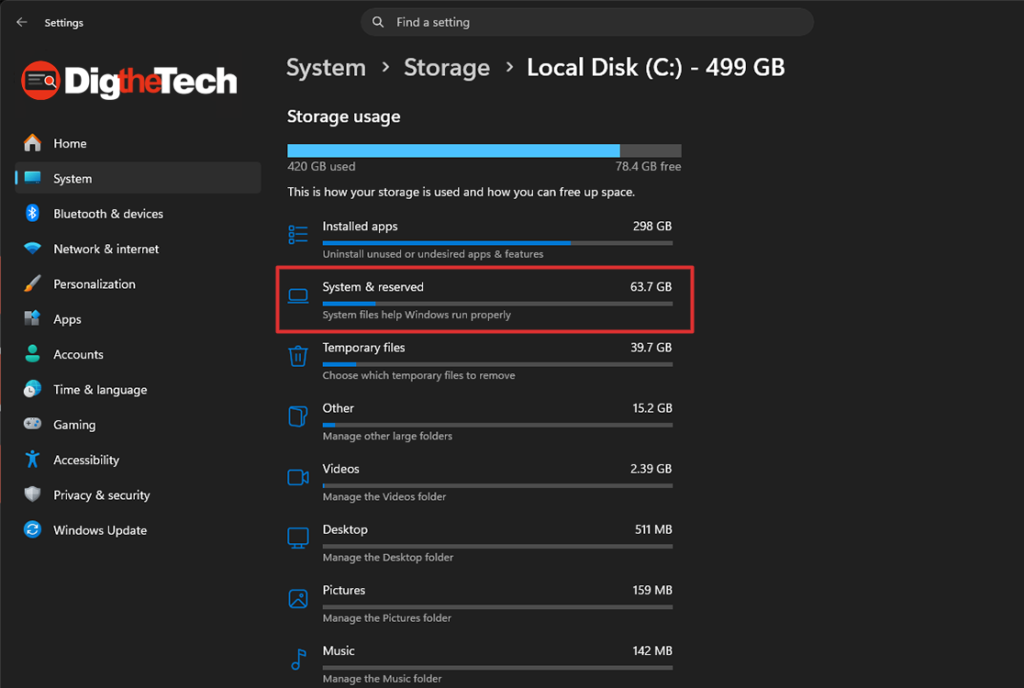
How Much Space Is It Actually Taking?
Here is how to check your own number.
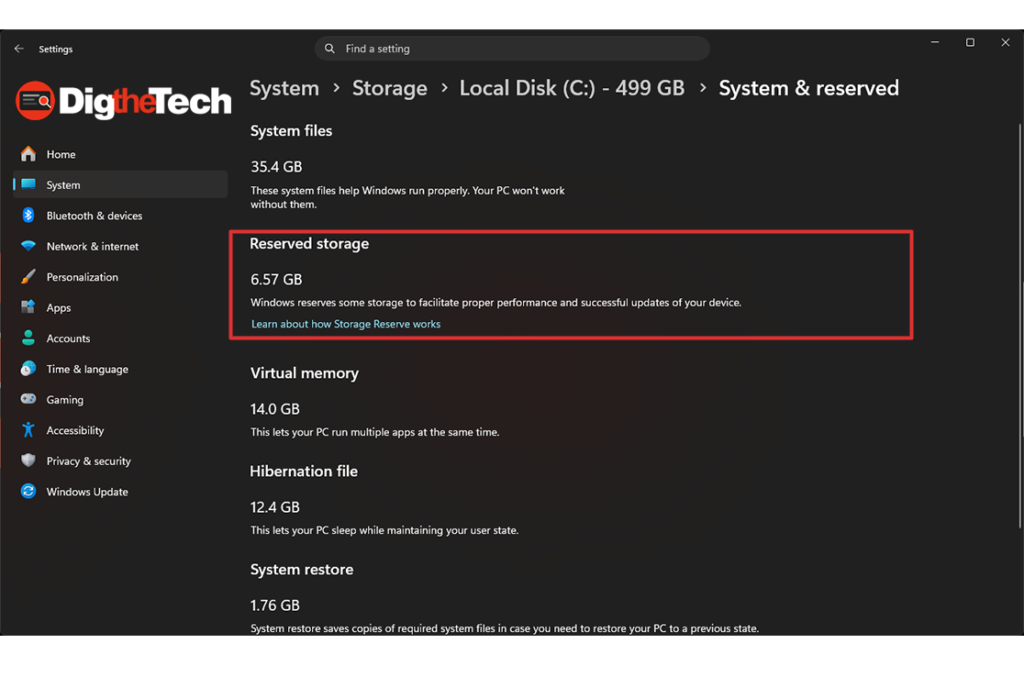
Go to Settings > System > Storage > Show more categories, then look for System & reserved.
Click it and look for the Reserved Storage line. On most machines, it shows somewhere between 7GB and 10GB. Some users with extra language packs or optional Windows features installed have seen it go higher.
That is potentially 10GB you are not using for anything you actually need.
Should You Turn It Off?
Honestly, it depends on your situation.
Turn it off if: – You have a 256GB or smaller SSD – Your drive is regularly getting above 80% full – You actively manage your own storage (you delete files, clear downloads, run Disk Cleanup occasionally)
Leave it on if: – You have 512GB or more and space is not a concern – You are not comfortable running any commands on your PC – You rarely clean up your drive and want Windows to handle things automatically
If you are not sure, check your storage first. If you have more than 100GB free, this probably is not your biggest problem.
How to Turn Off Reserved Storage (Step by Step)
You will need to run a single PowerShell command. Do not worry; it is one line, and you do not need to know any coding to do it.
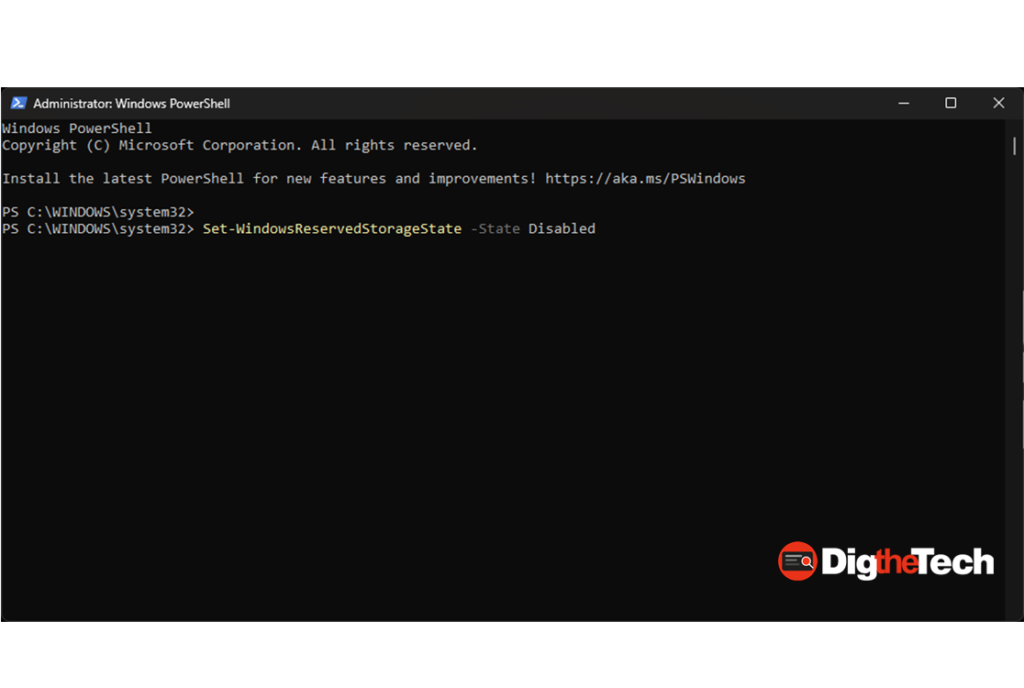
Step 1: Open PowerShell as Administrator
Click the Start menu and type PowerShell.
Right-click Windows PowerShell in the results, then choose Run as administrator.
A blue window will open. This is PowerShell.
Step 2: Run the Command
Type (or copy and paste) the following command and press Enter:
Set-WindowsReservedStorageState -State Disabled
That is it. No restart needed. Windows will confirm it ran correctly by showing no error message (a blank line means success).
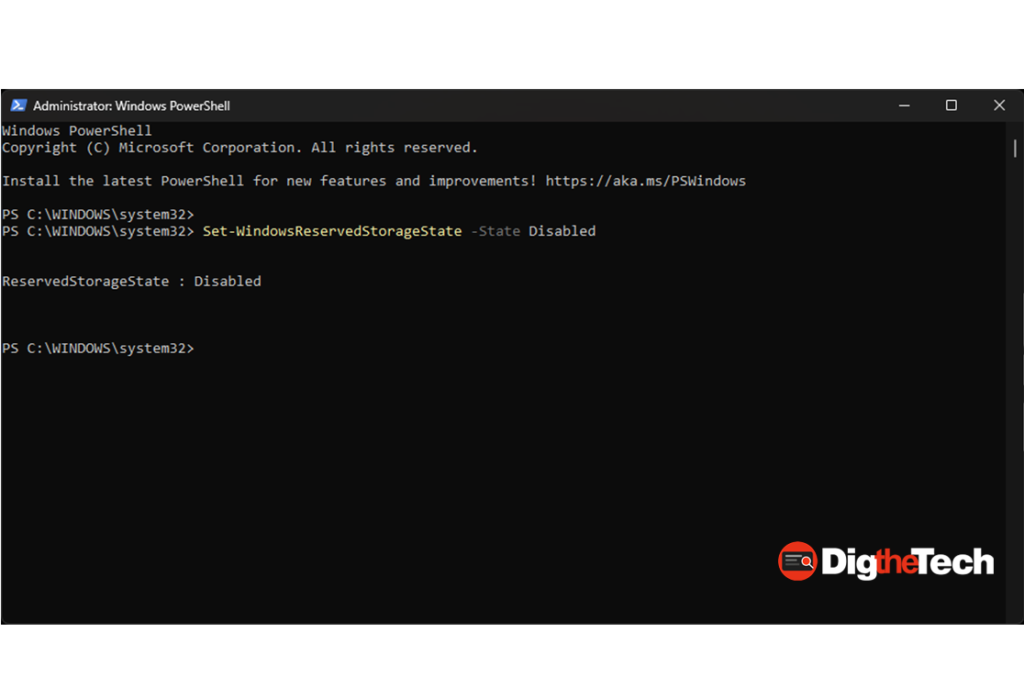
Step 3: Check Your Storage Again
Go back to Settings > System > Storage > System & reserved and check the Reserved Storage line. It should now show as 0 bytes or disappear entirely.
Your drive just got a few gigabytes back.
How to Turn It Back On
Changed your mind? No problem. Open PowerShell as administrator again and run:
Set-WindowsReservedStorageState -State Enabled
Windows will quietly set it back up the next time you install an update.
Other Quick Ways to Free Up Space on Windows 11
While you are in storage cleanup mode, here are three more things worth doing:
Run Storage Sense. Go to Settings > System > Storage and turn on Storage Sense. This automatically deletes temporary files, old downloads, and items in the recycle bin on a schedule you set. Costs you nothing.
Check your Downloads folder. Most people never clean this out. Right-click it and sort by size. You will probably find old installer files from apps you already installed months ago.
Use Disk Cleanup for system files. Search for Disk Cleanup in the Start menu, run it, then click Clean up system files. This removes old Windows update leftovers that can sometimes add up to several gigabytes.
None of these requires any technical skill. They are all built into Windows and are completely free.
Why This Matters More on Small Laptops
If you have a desktop PC with a 1TB drive, you don’t need to worry about Reserved Storage. You have plenty of room.
But many affordable laptops, the kind you would pick up for school, a small business, or everyday use, come with 256GB SSDs. Once you load Windows, your browser, Microsoft Office, and a few programs, you can easily use 150–180 GB.
At that point, every few gigabytes matters. An extra 7GB won’t change your life, but it might be the difference between your PC running smoothly and Windows constantly warning you that you are low on space.
Quick Summary
Reserved Storage in Windows 11 sets aside 7–10GB of your drive for Windows to use during updates and maintenance. You can disable it in about 30 seconds with a single PowerShell command. If you have a small SSD and manage your own storage, it is worth turning off. If space is not a concern, leave it alone.
Either way, now you know it is there.
Verified on Windows 11. The Reserved Storage feature has been part of Windows since 2019, per Microsoft’s official documentation at techcommunity.microsoft.com.